Home Blog Page 9

Why You Should Consider a Color Consultation Before Painting Your Home

0

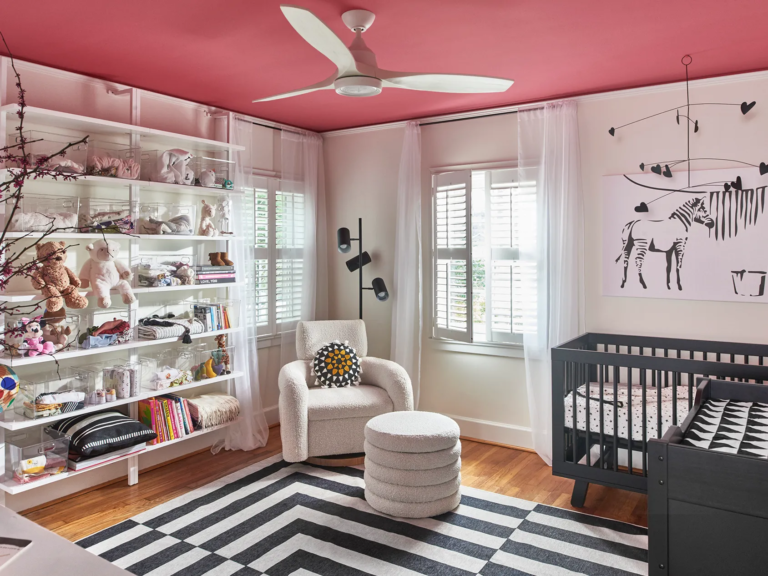
Choosing the right colors for your home can be both exciting and overwhelming. The colors you select have the power to transform your living space, influence your mood, and even affect the perceived size and style of a room. While it may seem tempting to choose paint colors on a whim, a color consultation can offer numerous benefits and help ensure that your home’s colors harmonize with your style and needs. This article explores why a color consultation is a worthwhile investment before painting your home.

Understanding the Impact of Color

  1. Psychological Effects
    • Mood and Atmosphere: Colors can influence how a room feels and how you experience it. For example, warm colors like red and orange can create a cozy, energetic atmosphere, while cool colors like blue and green can evoke calm and relaxation.
    • Emotional Responses: Different colors can trigger various emotional responses. A well-chosen color scheme can enhance your well-being and create the desired ambiance in each room.
  2. Spatial Perception
    • Room Size: Colors can affect the perception of space. Light colors tend to make rooms feel larger and more open, while dark colors can make them feel more intimate or cozy.
    • Light Reflection: Paint colors interact with light in a room, affecting how the space appears throughout the day. Proper color choices can enhance natural light and create a balanced lighting effect.
  3. Design Harmony
    • Consistency: Coordinating colors throughout your home ensures that each space flows seamlessly into the next. A cohesive color palette enhances the overall design and avoids the jarring effect of mismatched colors.
    • Style Alignment: Your color choices should align with your home’s architectural style and your personal design preferences. Colors that complement your home’s features and furnishings create a harmonious and appealing look.

Benefits of a Color Consultation

  1. Expert Advice and Guidance
    • Professional Insights: A color consultant brings expertise in color theory, trends, and design principles. They can provide valuable insights and recommendations based on your specific needs and preferences.
    • Personalized Solutions: A consultant considers your home’s unique characteristics, including lighting, architectural details, and existing decor. They offer tailored solutions that align with your vision and enhance your space.
  2. Avoiding Costly Mistakes
    • Informed Decisions: Choosing paint colors without proper guidance can lead to costly mistakes, such as selecting colors that clash with existing furnishings or don’t achieve the desired effect. A color consultant helps you avoid these pitfalls by offering informed advice.
    • Long-Term Satisfaction: Investing in a color consultation ensures that you are satisfied with your color choices in the long run. This can prevent the need for costly repainting and ensure that your home reflects your style and preferences.
  3. Streamlined Process
    • Efficient Planning: A color consultation streamlines the decision-making process by providing you with a clear plan and recommendations. This saves you time and reduces the stress associated with choosing paint colors.
    • Coordination and Execution: A consultant can help coordinate paint samples, finishes, and application techniques, ensuring a smooth and efficient painting process. They can also recommend reputable painters and suppliers if needed.
  4. Enhanced Design and Aesthetics
    • Harmonious Palette: A color consultant helps you create a cohesive and visually appealing color palette that enhances your home’s design. They ensure that colors complement each other and contribute to a balanced and aesthetically pleasing environment.
    • Design Trends: Consultants stay up-to-date with the latest design trends and color forecasts. They can introduce you to current trends and help you incorporate them into your home in a way that suits your style.

How to Prepare for a Color Consultation

  1. Define Your Goals and Preferences
    • Style and Atmosphere: Consider the style you want to achieve and the atmosphere you wish to create in each room. Whether you prefer a modern, traditional, or eclectic look, communicating your goals to the consultant will help them provide tailored recommendations.
    • Existing Elements: Take note of existing furnishings, fixtures, and architectural details that will remain unchanged. These elements should be considered when selecting paint colors to ensure a cohesive design.
  2. Gather Inspiration
    • Design Ideas: Collect images, samples, and design ideas that inspire you. This can include magazine clippings, Pinterest boards, or photos of spaces you admire. Sharing these with your consultant will help them understand your vision and preferences.
    • Color Preferences: Identify any colors you particularly like or dislike. This will provide a starting point for the consultant and help them narrow down options that align with your taste.
  3. Assess Your Space
    • Lighting Conditions: Evaluate the natural and artificial lighting in each room. Lighting can significantly impact how colors appear, so understanding your lighting conditions will help the consultant make appropriate recommendations.
    • Room Functionality: Consider the function of each room and how you want the color to support its use. For example, soothing colors may be ideal for bedrooms, while vibrant colors might suit a living room or playroom.

The Color Consultation Process

  1. Initial Consultation
    • Discussion: The consultant will discuss your goals, preferences, and any specific requirements you have. They will review your space and gather information about your existing decor and design style.
    • Assessment: The consultant will assess the lighting, architectural features, and overall layout of your home. This helps them understand how colors will interact with your space.
  2. Color Recommendations
    • Sample Presentation: The consultant will present a range of color samples and palettes based on your preferences and the characteristics of your home. They may use visual aids, such as digital mock-ups or paint samples, to help you visualize the options.
    • Final Selection: Together, you will select the final colors for each room. The consultant will provide guidance on color combinations, finishes, and application techniques to ensure a cohesive and visually pleasing result.
  3. Implementation
    • Coordination: The consultant can assist with coordinating paint samples, finishes, and suppliers. They may also recommend reputable painters or contractors to ensure high-quality execution.
    • Follow-Up: Some consultants offer follow-up services to review the completed project and address any concerns or adjustments. This ensures that the final result meets your expectations.

Conclusion

A color consultation is a valuable investment in ensuring that your home’s paint colors enhance its design and reflect your personal style. By seeking expert advice, you can avoid costly mistakes, streamline the decision-making process, and achieve a harmonious and aesthetically pleasing environment. Whether you’re updating a single room or painting your entire home, a color consultation can help you make informed choices and create a space that you’ll love for years to come.

How to Match Your Flooring with Your Interior Design Style

0

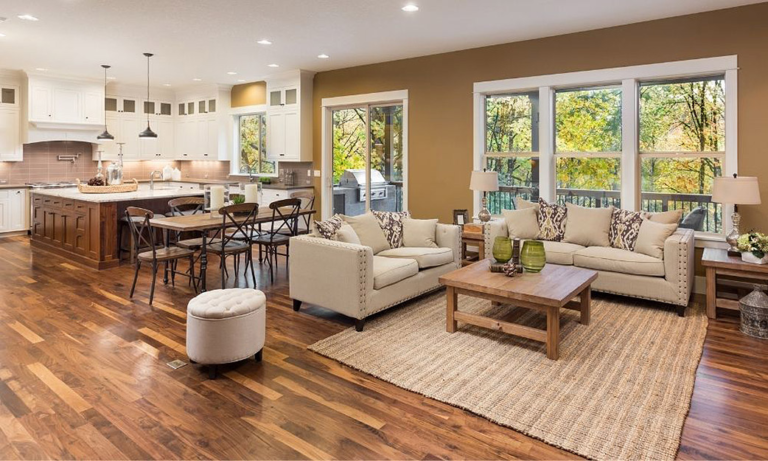
Choosing the right flooring for your home is a crucial step in interior design. The flooring you select can set the tone for your entire space, complementing your interior design style and enhancing the overall aesthetic. Whether you’re remodeling or building a new home, understanding how to match your flooring with your interior design style is essential for creating a cohesive and visually pleasing environment. This comprehensive guide will help you navigate the options and make informed decisions that reflect your style and preferences.

Understanding Different Flooring Types

Before matching flooring with your interior design style, it’s essential to familiarize yourself with the various flooring options available:

  1. Hardwood Flooring
    • Description: Hardwood flooring is known for its timeless beauty and durability. It comes in various types, including oak, maple, cherry, and walnut.
    • Styles: Traditional, rustic, contemporary, and modern.
  2. Laminate Flooring
    • Description: Laminate flooring is a cost-effective alternative to hardwood. It mimics the appearance of wood or stone but is more affordable and easier to maintain.
    • Styles: Traditional, modern, industrial, and transitional.
  3. Vinyl Flooring
    • Description: Vinyl flooring is available in sheets, tiles, or planks and is known for its resilience and water resistance.
    • Styles: Modern, contemporary, coastal, and traditional.
  4. Tile Flooring
    • Description: Tile flooring includes options like ceramic, porcelain, and natural stone. It is durable and suitable for high-moisture areas.
    • Styles: Mediterranean, modern, traditional, and rustic.
  5. Carpet Flooring
    • Description: Carpet adds warmth and comfort to a space. It comes in various materials, including wool, nylon, and polyester.
    • Styles: Traditional, contemporary, cozy, and eclectic.
  6. Engineered Wood Flooring
    • Description: Engineered wood consists of a real wood veneer over a plywood base, offering the look of hardwood with added stability.
    • Styles: Traditional, modern, and transitional.
  7. Concrete Flooring
    • Description: Concrete flooring is highly durable and can be customized with staining or polishing.
    • Styles: Modern, industrial, and minimalist.

Matching Flooring with Interior Design Styles

  1. Traditional Style
    • Characteristics: Traditional interiors are characterized by classic design elements, rich colors, and elegant furnishings.
    • Best Flooring Options: Hardwood flooring is a perfect match for traditional interiors. Opt for rich, dark tones like cherry or mahogany. Persian rugs or antique carpets can also complement traditional designs.
  2. Modern Style
    • Characteristics: Modern interiors focus on clean lines, minimalism, and a neutral color palette.
    • Best Flooring Options: For modern interiors, consider hardwood flooring with a light finish, such as white oak or ash. Alternatively, sleek options like polished concrete or large-format tiles can enhance the contemporary feel.
  3. Contemporary Style
    • Characteristics: Contemporary design embraces current trends, with an emphasis on versatility and openness.
    • Best Flooring Options: Vinyl planks and tiles offer a variety of designs and are easy to maintain. Opt for flooring with a natural look, such as wood or stone patterns, to keep the space modern yet timeless.
  4. Rustic Style
    • Characteristics: Rustic interiors showcase natural materials, distressed finishes, and a cozy, inviting atmosphere.
    • Best Flooring Options: Weathered hardwood flooring or reclaimed wood fits perfectly with rustic design. Stone tiles or terracotta can also complement the earthy and rugged aesthetic.
  5. Industrial Style
    • Characteristics: Industrial design features raw materials, exposed structures, and a utilitarian look.
    • Best Flooring Options: Concrete flooring is ideal for industrial spaces, offering a raw and edgy feel. You can also consider distressed wood or metal tiles for added texture.
  6. Coastal Style
    • Characteristics: Coastal interiors are light, airy, and inspired by beach and seaside elements.
    • Best Flooring Options: Light-colored hardwood or vinyl planks in shades of white or beige work well. Consider tile flooring in pale blues or sandy tones to enhance the coastal vibe.
  7. Transitional Style
    • Characteristics: Transitional design blends traditional and contemporary elements, offering a balanced and versatile look.
    • Best Flooring Options: Engineered wood flooring or laminate with a natural wood look can bridge the gap between traditional and modern. Neutral tones and classic patterns work well in transitional spaces.
  8. Mediterranean Style
    • Characteristics: Mediterranean interiors are known for their warm, inviting colors, intricate patterns, and ornate details.
    • Best Flooring Options: Terracotta tiles or patterned ceramic tiles are perfect for Mediterranean designs. Opt for earthy tones and decorative patterns to complement the style.
  9. Eclectic Style
    • Characteristics: Eclectic interiors mix various styles, colors, and patterns, creating a unique and personalized space.
    • Best Flooring Options: Choose flooring that allows for creativity, such as patterned tiles or colorful carpets. Mixing and matching different flooring types can enhance the eclectic look.

Tips for Choosing the Right Flooring

  1. Consider Functionality
    • Traffic and Usage: Choose flooring based on the room’s function and traffic level. High-traffic areas like hallways and living rooms require durable materials, while bedrooms and offices can accommodate softer options.
  2. Match Color and Texture
    • Consistency: Ensure that the color and texture of the flooring complement your overall design scheme. Neutral tones and subtle textures offer versatility, while bold colors and patterns can create focal points.
  3. Evaluate Maintenance
    • Ease of Care: Consider the maintenance requirements of each flooring type. Hardwood and tile may require regular cleaning and occasional refinishing, while vinyl and laminate are generally easier to maintain.
  4. Incorporate Lighting
    • Natural and Artificial Light: The amount of natural and artificial light in your space can affect how the flooring looks. Test samples in different lighting conditions to see how they interact with your design.
  5. Think Long-Term
    • Durability and Longevity: Invest in flooring that will stand the test of time. High-quality materials and finishes will ensure that your flooring remains attractive and functional for years to come.
  6. Sample Before You Commit
    • Test Swatches: Always get samples of your chosen flooring and view them in your home’s lighting and setting. This helps ensure that you are satisfied with the look and feel before making a final decision.

Conclusion

Choosing the right flooring is a key element in achieving a cohesive and stylish interior design. By understanding the different types of flooring and how they align with various design styles, you can make informed decisions that enhance the beauty and functionality of your space. Whether you prefer the timeless elegance of hardwood, the durability of tile, or the versatility of vinyl, selecting flooring that complements your interior design style will create a harmonious and inviting environment. With careful planning and consideration, you can achieve a flooring choice that reflects your personal style and meets your practical needs.

The Cost of Roof Replacement: What to Expect

0

Roof replacement is a significant home improvement project that can enhance the safety, functionality, and aesthetics of your home. However, it is also a substantial financial investment. Understanding the cost factors involved in roof replacement can help you plan and budget effectively. This comprehensive guide explores the various aspects of roof replacement costs, including factors influencing the price, average costs, and tips for managing expenses.

Understanding Roof Replacement Costs

The cost of roof replacement varies widely depending on several factors, including the size and pitch of the roof, the materials used, and the complexity of the installation. On average, homeowners can expect to pay between $5,000 and $15,000 for a new roof, but prices can fluctuate based on individual circumstances and preferences.

Factors Influencing Roof Replacement Costs

  1. Roof Size and Pitch
    • Size: The size of your roof is one of the most significant factors in determining the cost. Roofs are measured in squares, with one square equaling 100 square feet. Larger roofs require more materials and labor, increasing the overall cost.
    • Pitch: The pitch or slope of your roof also affects the cost. Steeper roofs are more challenging to work on, requiring additional safety measures and specialized equipment. This can lead to higher labor costs.
  2. Roofing Materials
    • Asphalt Shingles: Asphalt shingles are the most common roofing material due to their affordability and ease of installation. They generally cost between $90 and $100 per square, with the total cost ranging from $4,000 to $8,000 for a standard roof.
    • Metal Roofing: Metal roofs are durable and energy-efficient but come at a higher cost. They typically range from $100 to $300 per square, with total costs between $7,000 and $15,000.
    • Wood Shingles: Wood shingles provide a natural and attractive look but require regular maintenance. They cost between $150 and $300 per square, with total costs ranging from $8,000 to $16,000.
    • Slate Roofing: Slate is a premium roofing material known for its longevity and aesthetic appeal. It is also one of the most expensive options, costing between $400 and $600 per square, with total costs ranging from $20,000 to $40,000.
    • Tile Roofing: Tile roofs are durable and available in various styles, such as clay and concrete. They generally cost between $300 and $500 per square, with total costs ranging from $15,000 to $30,000.
  3. Roof Complexity
    • Simple vs. Complex Roofs: The complexity of your roof’s design impacts labor costs. Simple, single-pitched roofs are less expensive to replace than roofs with multiple peaks, valleys, and chimneys.
    • Existing Layers: If your home has multiple layers of shingles, they will need to be removed before installing a new roof. This adds to the labor and disposal costs.
  4. Labor Costs
    Labor costs vary based on your location, the contractor’s experience, and the project’s complexity. On average, labor costs account for about 60% of the total roof replacement cost. Always get multiple quotes from reputable contractors to ensure you receive a fair price.
  5. Additional Costs
    • Permits and Inspections: Many localities require permits for roof replacement. The cost of permits varies by location and can range from $100 to $500. Inspections may also be necessary, adding to the overall cost.
    • Roof Decking: If your roof decking (the material underneath the shingles) is damaged or deteriorated, it may need to be replaced. This adds to the cost of the project.
    • Ventilation and Insulation: Proper ventilation and insulation are crucial for a healthy roofing system. If these components need updating or repair, they will add to the cost.

Average Costs for Roof Replacement by Material

  • Asphalt Shingles: $4,000 – $8,000
  • Metal Roofing: $7,000 – $15,000
  • Wood Shingles: $8,000 – $16,000
  • Slate Roofing: $20,000 – $40,000
  • Tile Roofing: $15,000 – $30,000

These ranges are estimates and can vary based on factors such as the size of the roof, labor costs, and additional features or repairs required.

How to Save on Roof Replacement Costs

  1. Get Multiple Quotes
    • Obtain quotes from at least three contractors to compare prices and services. Ensure that each quote includes a detailed breakdown of costs to facilitate comparison.
  2. Consider Off-Season Replacement
    • Roofing contractors may offer lower rates during the off-season (typically fall and winter) when they have fewer projects. Scheduling your roof replacement during these months could lead to cost savings.
  3. Explore Financing Options
    • Many roofing companies offer financing options or payment plans to help manage the cost. Additionally, some credit cards and home improvement loans can provide funding for roof replacement.
  4. Check for Discounts and Rebates
    • Look for manufacturer rebates or discounts on roofing materials. Some energy-efficient roofing materials may also qualify for tax credits or rebates.
  5. Prioritize Quality
    • Investing in high-quality materials and skilled contractors may result in higher upfront costs but can save you money in the long run by reducing the need for frequent repairs and replacements.

Tips for Hiring a Roofing Contractor

  1. Research Reputable Contractors
    • Check online reviews, ask for recommendations from friends or family, and verify the contractor’s credentials with local trade associations.
  2. Verify Insurance and Licensing
    • Ensure that the contractor is licensed and insured. This protects you from liability in case of accidents or damage during the project.
  3. Review the Contract
    • Carefully review the contract before signing. Ensure it includes details about the scope of work, materials, payment schedule, and warranty.
  4. Ask for References
    • Request references from previous clients and inspect completed projects to assess the contractor’s workmanship and reliability.

Conclusion

Roof replacement is a significant investment that can enhance the value, safety, and comfort of your home. Understanding the factors that influence the cost, such as roof size, materials, and complexity, can help you plan and budget effectively. By obtaining multiple quotes, exploring financing options, and hiring a reputable contractor, you can manage the costs and ensure a successful roof replacement project. Whether you’re replacing an aging roof or upgrading to a new material, being informed and prepared will help you make the best decisions for your home and budget.

Understanding Real Estate Market Cycles: What Buyers and Sellers Need to Know

0

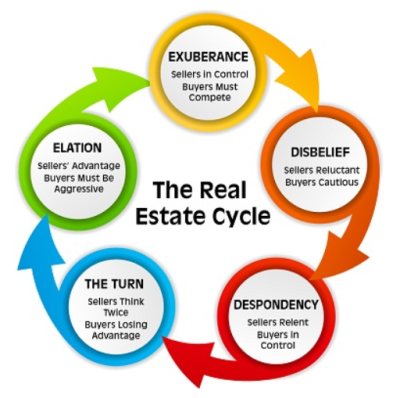
The real estate market is a dynamic and cyclical environment that can significantly impact the decisions of both buyers and sellers. Understanding these market cycles is crucial for making informed decisions whether you’re looking to purchase a home or sell one. This comprehensive guide explores real estate market cycles, their phases, and what buyers and sellers need to know to navigate them successfully.

What Are Real Estate Market Cycles?

Real estate market cycles refer to the predictable phases of growth and decline that characterize the housing market over time. These cycles are influenced by various economic factors, including interest rates, employment levels, and economic growth. Understanding these cycles helps buyers and sellers anticipate market trends and make strategic decisions.

Phases of Real Estate Market Cycles

Real estate market cycles typically consist of four distinct phases: recovery, expansion, hyper-supply, and recession. Each phase has its characteristics and implications for buyers and sellers.

  1. Recovery
    The recovery phase follows a market downturn or recession. During this period, economic conditions begin to improve, and the real estate market starts to show signs of stabilization. Property values may still be relatively low, but there is a gradual increase in demand.
    • Characteristics: Increased buyer activity, rising property prices, and lower inventory levels.
    • Opportunities for Buyers: This phase offers potential bargains as prices start to recover. Buyers should be prepared to act quickly as competition increases.
    • Opportunities for Sellers: Sellers may start to see more interest in their properties, but it’s essential to price homes competitively to attract buyers.
  2. Expansion
    The expansion phase is characterized by a robust economy and strong demand for real estate. Property values increase steadily, and new construction projects become more common. This phase is marked by a seller’s market where demand outstrips supply.
    • Characteristics: Rising property prices, high demand, and increased construction activity.
    • Opportunities for Buyers: Buyers may face higher prices and increased competition. It’s important to have pre-approved financing and be prepared to make competitive offers.
    • Opportunities for Sellers: Sellers can benefit from high property values and strong demand. Homes tend to sell quickly, often at or above the asking price.
  3. Hyper-Supply
    The hyper-supply phase occurs when the market becomes saturated with properties. During this period, the rate of new construction exceeds demand, leading to an oversupply of homes. Property values may start to plateau or decline.
    • Characteristics: Excess inventory, longer time on the market, and decreasing property values.
    • Opportunities for Buyers: Buyers have more options and may find better deals as sellers become more motivated. It’s a good time to negotiate on price and terms.
    • Opportunities for Sellers: Sellers may face challenges in achieving their desired price. It’s important to make properties stand out through staging and competitive pricing.
  4. Recession
    The recession phase is marked by a downturn in the real estate market, often due to economic factors like high unemployment or rising interest rates. Property values decline, and sales activity slows down.
    • Characteristics: Falling property values, reduced demand, and increased foreclosures.
    • Opportunities for Buyers: Buyers may find lower prices and increased leverage. It’s a good time to buy if you can afford it and are willing to hold onto the property until the market recovers.
    • Opportunities for Sellers: Selling during a recession can be challenging. Sellers may need to adjust their expectations and price properties competitively to attract buyers.

How Economic Factors Influence Real Estate Cycles

Several economic factors influence real estate market cycles:

  1. Interest Rates
    Interest rates have a significant impact on real estate cycles. Low interest rates can stimulate demand by making borrowing cheaper, leading to a rise in property values. Conversely, high interest rates can dampen demand and lead to a slowdown in the market.
  2. Employment Levels
    Employment levels affect buyer confidence and purchasing power. High employment rates generally lead to higher demand for housing, while high unemployment can reduce demand and impact property values.
  3. Economic Growth
    Economic growth drives demand for real estate by increasing consumer confidence and spending power. During periods of economic expansion, people are more likely to invest in real estate, contributing to rising property values.
  4. Supply and Demand
    The balance between housing supply and demand is a key factor in market cycles. An imbalance, whether due to excessive new construction or a shortage of inventory, can lead to fluctuations in property values and market conditions.

Strategies for Buyers and Sellers in Different Market Phases

Understanding market cycles allows buyers and sellers to adopt strategies tailored to the current phase of the cycle:

  1. In a Recovery Phase
    • For Buyers: Look for properties in emerging neighborhoods with growth potential. Be prepared to move quickly and negotiate effectively as competition increases.
    • For Sellers: Price your home competitively and be prepared for an increase in buyer activity. Focus on making your home appealing to potential buyers.
  2. In an Expansion Phase
    • For Buyers: Act swiftly and be ready to make competitive offers. Consider locking in a mortgage rate if interest rates are rising.
    • For Sellers: Take advantage of high property values and strong demand. Ensure your home is in excellent condition to attract buyers and maximize your sale price.
  3. In a Hyper-Supply Phase
    • For Buyers: Explore a wide range of properties and take your time to find the best deal. Use the oversupply to negotiate favorable terms and prices.
    • For Sellers: Be prepared for longer selling times and potential price reductions. Enhance your property’s appeal through staging and pricing strategies.
  4. In a Recession Phase
    • For Buyers: Look for bargains and be patient. Use the opportunity to purchase at lower prices, but be prepared for a potentially slower market.
    • For Sellers: Adjust your expectations and price your property competitively. Consider offering incentives to attract buyers and make your property stand out.

How to Stay Informed About Market Cycles

To make informed decisions, it’s essential to stay updated on real estate market trends:

  1. Monitor Market Reports
    Regularly review market reports and analyses from real estate agencies, economic forecasts, and industry publications. These reports provide insights into current market conditions and future trends.
  2. Consult Real Estate Professionals
    Work with experienced real estate agents and brokers who have a deep understanding of local market conditions. They can offer valuable advice and help you navigate the market based on current cycles.
  3. Attend Industry Seminars and Workshops
    Participate in real estate seminars, workshops, and webinars to stay informed about market trends and strategies. These events often feature expert speakers and provide valuable networking opportunities.
  4. Follow Economic Indicators
    Keep an eye on economic indicators such as interest rates, employment data, and GDP growth. These indicators can help you anticipate changes in the real estate market and make strategic decisions.

Conclusion

Understanding real estate market cycles is crucial for both buyers and sellers looking to navigate the housing market successfully. By recognizing the phases of the market cycle—recovery, expansion, hyper-supply, and recession—you can make informed decisions and adopt strategies that align with current market conditions. Staying informed about economic factors and market trends will help you capitalize on opportunities and mitigate risks. Whether you’re buying your first home or selling an investment property, a solid grasp of market cycles will enable you to make more strategic and effective real estate decisions.

Creating a Pollinator-Friendly Garden: Services That Make It Easy

0

Creating a pollinator-friendly garden is more than just a trend—it’s a crucial step in supporting the health of our ecosystems. Pollinators like bees, butterflies, and hummingbirds play a vital role in the environment by helping plants reproduce. However, many gardeners find it challenging to design and maintain gardens that cater to these important creatures. Fortunately, there are specialized services that can make the process easier and more effective. This article explores how to create a pollinator-friendly garden and the services available to help you achieve this goal.

Why a Pollinator-Friendly Garden Matters

Pollinators are essential for the reproduction of many plants, including those that produce fruits, vegetables, and nuts. Without these creatures, the availability of these food sources would be severely compromised. Additionally, pollinators contribute to the overall health of ecosystems by supporting plant diversity and providing food for other wildlife.

Creating a garden that supports pollinators offers several benefits:

  • Biodiversity: A diverse garden attracts various pollinators, enhancing local biodiversity.
  • Food Security: Pollinators improve the production of fruits and vegetables.
  • Environmental Health: Pollinator-friendly gardens contribute to a balanced ecosystem.

Key Elements of a Pollinator-Friendly Garden

To attract and support pollinators, your garden should include specific elements:

  1. Diverse Plant Selection
    Pollinators are attracted to a variety of flowers, herbs, and shrubs. Choosing plants that bloom at different times of the year ensures a continuous food supply. Include native plants, as they are better adapted to your local climate and more attractive to local pollinators.
  2. Nectar and Pollen Sources
    Ensure your garden provides ample nectar and pollen sources. Plants with tubular flowers, like bee balm and trumpet creeper, are particularly attractive to hummingbirds. Composite flowers, such as sunflowers and coneflowers, are excellent for bees and butterflies.
  3. Shelter and Nesting Sites
    Pollinators need safe places to rest and nest. Incorporate features like bee hotels, butterfly houses, and dense shrubs. Avoid using pesticides, as they can harm pollinators and disrupt their habitat.
  4. Water Sources
    A water source is essential for pollinators. A birdbath, shallow dish, or small pond can provide the hydration they need. Ensure the water is clean and regularly changed to prevent mosquito breeding.
  5. Organic Practices
    Use organic gardening practices to maintain a healthy environment. Avoid chemical fertilizers and pesticides that can harm pollinators. Instead, opt for natural pest control methods and composting to enrich the soil.

Services to Help Create a Pollinator-Friendly Garden

Several services can assist you in designing and maintaining a pollinator-friendly garden:

  1. Landscape Design Services
    Professional landscape designers can help you create a garden plan that attracts and supports pollinators. They can recommend suitable plants, design garden layouts, and integrate features like water sources and shelter. Landscape designers have expertise in choosing plants that thrive in your local climate and are appealing to pollinators.
    How to Find a Landscape Designer: Look for professionals with experience in creating wildlife-friendly gardens. Check reviews and ask for examples of previous work. Ensure they understand the needs of pollinators and can create a garden plan that meets your goals.
  2. Garden Centers and Nurseries
    Local garden centers and nurseries often offer a variety of pollinator-friendly plants. Many also provide advice on plant selection and garden design. Some centers have staff knowledgeable about local pollinators and can help you choose plants that will attract them.
    What to Look For: Choose garden centers that offer a range of native plants and can provide guidance on creating a pollinator-friendly garden. Look for plants labeled as beneficial for bees, butterflies, and other pollinators.
  3. Environmental Consultants
    Environmental consultants can assess your garden and provide recommendations for improving its pollinator habitat. They can evaluate soil quality, water management, and plant selection to ensure your garden supports local wildlife.
    How to Work with an Environmental Consultant: Choose a consultant with experience in creating wildlife habitats. They should offer a comprehensive assessment and actionable recommendations to enhance your garden’s appeal to pollinators.
  4. Pollinator-Friendly Garden Programs
    Many communities and organizations offer programs designed to help gardeners create pollinator-friendly spaces. These programs may provide educational resources, grants, or even free plants. Participating in such programs can offer additional support and resources for your gardening efforts.
    How to Find Programs: Check with local environmental organizations, garden clubs, and government agencies. Look for programs that offer resources for pollinator-friendly gardening and connect with other gardeners interested in supporting pollinators.
  5. Gardening Workshops and Classes
    Attending workshops and classes can provide valuable knowledge on creating and maintaining a pollinator-friendly garden. These educational opportunities cover topics such as plant selection, garden design, and organic practices.
    Where to Find Workshops: Look for workshops offered by local garden centers, botanical gardens, and community organizations. Online classes are also available and can offer flexibility in learning.
  6. Maintenance Services
    Once your pollinator-friendly garden is established, ongoing maintenance is crucial to keep it healthy and attractive to pollinators. Maintenance services can help with tasks such as pruning, mulching, and seasonal plant care.
    Choosing a Maintenance Service: Look for gardening services that specialize in organic practices and have experience with pollinator-friendly gardens. Ensure they understand the importance of maintaining a habitat that supports local wildlife.

Tips for Maintaining a Pollinator-Friendly Garden

To ensure your garden remains an effective habitat for pollinators, follow these maintenance tips:

  1. Regular Monitoring
    Observe your garden regularly to ensure plants are healthy and pollinators are visiting. Look for signs of pest problems or plant diseases and address them promptly.
  2. Seasonal Care
    Adjust your garden care routine based on the seasons. For example, deadhead spent flowers to encourage continuous blooming and prune plants as needed to promote healthy growth.
  3. Soil Health
    Maintain healthy soil by adding compost and organic matter. Healthy soil supports robust plant growth and provides a better habitat for pollinators.
  4. Pesticide Alternatives
    Use natural pest control methods to manage pests without harming pollinators. Consider introducing beneficial insects like ladybugs or using organic sprays and traps.
  5. Continuous Planting
    Keep adding new plants to your garden to ensure a diverse and continuous food source for pollinators. Aim for a mix of annuals and perennials that bloom at different times.

Conclusion

Creating a pollinator-friendly garden is a rewarding endeavor that supports the environment and enhances the beauty of your outdoor space. By incorporating key elements like diverse plant selections, water sources, and shelter, you can attract and support a variety of pollinators. Utilizing professional services, such as landscape design, environmental consulting, and maintenance, can simplify the process and ensure your garden thrives. With the right planning and support, you can enjoy a vibrant, eco-friendly garden that benefits both pollinators and your local ecosystem.

How to Identify and Fix Low Water Pressure in Your Home

0

Low water pressure can be a frustrating issue for homeowners, impacting everything from daily showers to washing dishes. If you’re experiencing weak water flow in your home, it’s essential to identify the cause and address it promptly. This article will guide you through the process of diagnosing and fixing low water pressure issues, ensuring a smoother and more efficient plumbing system in your home.

Understanding Low Water Pressure

Low water pressure occurs when the force of water flowing through your pipes is insufficient to provide a strong stream at your faucets or fixtures. This can affect one specific area, such as a single faucet or showerhead, or impact your entire home. Common signs of low water pressure include weak shower flow, slow-filling sinks, and diminished performance from appliances that use water.

Common Causes of Low Water Pressure

Before addressing the issue, it’s important to understand the potential causes of low water pressure:

  1. Clogged Pipes: Over time, mineral deposits, rust, and debris can accumulate inside your pipes, reducing water flow. This is especially common in older homes with galvanized steel pipes.
  2. Leaky Pipes: Leaks in your plumbing system can lead to a decrease in water pressure. Water escaping from a pipe can significantly reduce the amount of water reaching your fixtures.
  3. Faulty Pressure Regulator: Many homes have a pressure regulator installed to control water pressure. If this regulator fails or is set incorrectly, it can cause low water pressure.
  4. Water Supply Issues: Problems with the municipal water supply or low pressure from your water provider can also lead to reduced water pressure in your home.
  5. Faulty Fixtures: Sometimes, the issue might be with a specific fixture, such as a showerhead or faucet, which can become clogged with sediment or debris.
  6. Water Meter Valve: If the valve on your water meter is partially closed, it can restrict water flow into your home, leading to low water pressure.

Diagnosing Low Water Pressure

To effectively fix low water pressure, you first need to diagnose the cause. Here’s a step-by-step approach to help you pinpoint the issue:

  1. Check Multiple Fixtures
    Start by testing the water pressure at various fixtures throughout your home. If only one fixture, such as a specific faucet or showerhead, is affected, the issue may be isolated to that fixture. If the problem is widespread, it could indicate a more significant issue with your plumbing system.
  2. Inspect for Leaks
    Look for visible signs of leaks around your home. Check under sinks, around toilets, and in areas where pipes are exposed. Water stains, damp spots, or puddles can indicate a leak. If you suspect a leak but cannot find it, consider using a leak detection service.
  3. Examine the Pressure Regulator
    If your home has a pressure regulator, check to ensure it is functioning correctly. The pressure regulator is typically located where the main water line enters your home. A malfunctioning or improperly set regulator can cause low water pressure.
  4. Test the Water Meter Valve
    Locate the water meter valve, which is usually found near the street or sidewalk. Ensure that the valve is fully open. A partially closed valve can restrict water flow into your home and reduce pressure.
  5. Inspect Fixtures
    Remove and inspect your fixtures, such as faucets and showerheads. Check for clogs or buildup of sediment and debris. Clean or replace these fixtures if necessary to restore proper water flow.

Fixing Low Water Pressure

Once you’ve identified the cause of low water pressure, you can take the following steps to address and fix the issue:

  1. Clean or Replace Fixtures
    If you’ve found that a fixture is clogged or obstructed, clean it thoroughly. For faucets, remove the aerator and soak it in a solution of vinegar and water to dissolve mineral deposits. For showerheads, remove and clean it, or replace it if cleaning doesn’t resolve the issue.
  2. Clear Clogs in Pipes
    If you suspect that your pipes are clogged with mineral deposits or debris, consider using a pipe descaler or cleaner. For severe clogs, you may need to hire a professional plumber to perform a thorough cleaning or pipe replacement.
  3. Fix Leaky Pipes
    Address any leaks in your plumbing system by repairing or replacing the damaged pipes. For small leaks, you may be able to use pipe sealant or repair tape. For larger or more complex leaks, it’s best to consult a professional plumber.
  4. Adjust or Replace the Pressure Regulator
    If your pressure regulator is malfunctioning or incorrectly set, you may need to adjust or replace it. To adjust the regulator, locate the adjustment screw and turn it to increase or decrease the pressure. If the regulator is faulty, replacing it with a new one may be necessary.
  5. Check the Water Supply
    If the issue is related to the municipal water supply or low pressure from your water provider, contact them to report the problem. They can investigate and address any issues with the water supply that may be affecting your home.
  6. Open the Water Meter Valve
    Ensure that the water meter valve is fully open to allow maximum water flow into your home. If the valve is partially closed, it can restrict water pressure and affect your fixtures.
  7. Flush Your Water System
    Sometimes, flushing your water system can help clear out debris or sediment that may be affecting water pressure. To do this, turn on all the faucets in your home and let the water run for several minutes. This can help dislodge any buildup and improve water flow.
  8. Install a Water Pressure Booster
    If low water pressure persists despite your efforts, consider installing a water pressure booster pump. This device can help increase water pressure throughout your home, providing a more consistent and powerful flow.

Preventing Low Water Pressure Issues

To avoid future problems with low water pressure, consider these preventative measures:

  1. Regular Maintenance
    Schedule regular maintenance for your plumbing system to detect and address potential issues before they become major problems. This includes inspecting pipes, fixtures, and the pressure regulator.
  2. Water Softening
    If you live in an area with hard water, installing a water softener can help reduce mineral buildup in your pipes and fixtures. This can prevent clogs and improve water flow.
  3. Monitor Water Usage
    Be mindful of your water usage and avoid overloading your plumbing system. Excessive water use can strain your pipes and contribute to low water pressure.
  4. Upgrade Plumbing
    In older homes with outdated plumbing systems, consider upgrading to modern pipes and fixtures. Newer materials and technologies can improve water flow and reduce the likelihood of low water pressure.

Conclusion

Low water pressure can be a frustrating issue, but with the right approach, it can be diagnosed and resolved effectively. By understanding the common causes of low water pressure and taking appropriate measures to fix and prevent it, you can ensure a more reliable and efficient plumbing system in your home. Regular maintenance, proper fixture care, and prompt attention to plumbing issues will help you maintain optimal water pressure and enjoy a more comfortable living environment. If you encounter persistent problems or complex issues, don’t hesitate to seek professional assistance to ensure a thorough and effective solution.

The Cost of Professional Home Cleaning: Is It Worth It?

0

Maintaining a clean and organized home is crucial for both health and comfort. However, with busy lifestyles and demanding schedules, many homeowners find it challenging to keep up with regular cleaning tasks. This has led to an increasing interest in professional home cleaning services. But is the cost of hiring a professional cleaner worth the investment? In this article, we will explore the various aspects of professional home cleaning, including its costs, benefits, and whether it’s a worthwhile expenditure for your home.

Understanding the Cost of Professional Home Cleaning

The cost of professional home cleaning can vary widely depending on several factors:

  • Size of the Home: Larger homes with more square footage generally cost more to clean. Cleaning services typically charge based on the size of the property, so a bigger home will require a higher investment.
  • Type of Cleaning Service: There are different types of cleaning services available, including regular cleaning, deep cleaning, and specialized services like carpet cleaning or upholstery cleaning. Each type has its own pricing structure. For instance, a deep cleaning service will cost more than a standard cleaning due to the additional time and effort required.
  • Frequency of Service: The frequency with which you require cleaning services will also affect the cost. Regular, scheduled cleanings (e.g., weekly or bi-weekly) may be priced differently than one-time or occasional cleanings. Many cleaning companies offer discounts for regular service agreements.
  • Location: The cost of living in your area can impact cleaning service rates. Services in metropolitan areas or regions with a higher cost of living are likely to be more expensive than those in smaller towns or rural areas.
  • Additional Services: Extra services such as window cleaning, oven cleaning, or laundry can add to the overall cost. It’s important to clarify what is included in the standard cleaning package and what would incur additional charges.

Benefits of Professional Home Cleaning

When evaluating whether professional home cleaning is worth the cost, it’s essential to consider the numerous benefits it offers:

  1. Time Savings

One of the most significant advantages of hiring a professional cleaner is the amount of time you save. Cleaning your home can be time-consuming, especially if you have a busy schedule. By outsourcing this task, you free up valuable time that can be better spent on work, hobbies, or family activities.

  1. High-Quality Cleaning

Professional cleaners use specialized equipment and high-quality cleaning products that may not be available to the average homeowner. Their expertise ensures that every corner of your home is thoroughly cleaned, resulting in a higher standard of cleanliness and a healthier living environment.

  1. Consistency

With a professional cleaning service, you can enjoy consistent results. Regular cleaning schedules ensure that your home remains clean and organized, reducing the likelihood of dirt and grime buildup. Consistent cleaning also helps maintain the longevity of your home’s surfaces and furnishings.

  1. Reduced Stress

Cleaning can be a stressful and physically demanding task. By delegating this responsibility to professionals, you can reduce stress and avoid the physical strain associated with cleaning. This can contribute to better mental well-being and overall quality of life.

  1. Customized Cleaning Plans

Many professional cleaning services offer customizable cleaning plans to meet your specific needs. Whether you require a one-time deep cleaning or ongoing maintenance, you can tailor the service to fit your requirements. This flexibility ensures that you receive the level of cleaning that best suits your home.

  1. Improved Health

Regular professional cleaning helps reduce allergens, dust, and other harmful particles that can impact indoor air quality. This is especially beneficial for individuals with allergies or respiratory conditions. A cleaner home contributes to a healthier living environment and can lead to fewer illnesses and allergies.

  1. Professional Expertise

Professional cleaners are trained and experienced in cleaning techniques and best practices. Their expertise ensures that cleaning tasks are completed efficiently and effectively. They can handle specialized cleaning tasks, such as removing tough stains or cleaning delicate surfaces, with care and precision.

Evaluating the Worth of Professional Home Cleaning

To determine whether professional home cleaning is worth the cost for you, consider the following factors:

  1. Your Budget

Assess your budget and determine whether you can comfortably afford professional cleaning services. While it’s an investment, many homeowners find that the time and convenience gained outweigh the expense. Evaluate your financial situation and prioritize your spending to see if professional cleaning fits within your budget.

  1. Your Cleaning Needs

Consider the level of cleaning required in your home. If you struggle with maintaining cleanliness or have specific cleaning challenges, professional services might be a worthwhile investment. On the other hand, if you can manage cleaning tasks on your own and are satisfied with the results, you may not need professional services.

  1. Frequency of Cleaning

If you require cleaning services frequently, such as weekly or bi-weekly, you may benefit from a regular cleaning service that offers discounted rates. For occasional or one-time cleanings, evaluate whether the cost aligns with the value you receive. Regular service agreements often provide better value over time.

  1. Time Constraints

Assess your time constraints and how they impact your ability to clean your home. If your schedule leaves little room for cleaning, the convenience of professional services may be worth the cost. Consider how much time you can save and whether it allows you to focus on other priorities.

  1. Quality of Service

Research and compare different cleaning services to ensure you receive high-quality service for the price. Read reviews, ask for recommendations, and inquire about the cleaning company’s reputation. Ensuring that you choose a reputable and reliable service provider will enhance the value of your investment.

  1. Long-Term Benefits

Consider the long-term benefits of professional home cleaning, such as improved health, reduced stress, and consistent cleanliness. These benefits can contribute to a better living environment and overall well-being. Evaluate how these factors align with your lifestyle and whether they justify the cost.

Alternatives to Professional Home Cleaning

If the cost of professional cleaning services is a concern, consider alternative options:

  • DIY Cleaning: Performing cleaning tasks yourself can save money. Create a cleaning schedule and allocate specific times for each task to manage your cleaning effectively.
  • Hiring Part-Time Help: If full-time professional cleaning services are outside your budget, consider hiring part-time help for specific tasks or occasional cleanings.
  • Using Cleaning Products and Tools: Invest in high-quality cleaning products and tools to make cleaning more efficient. Many products are designed to simplify the cleaning process and deliver excellent results.
  • Family Participation: Involve family members in cleaning tasks to share the workload. Assign age-appropriate chores to children and encourage everyone to contribute to maintaining a clean home.

Conclusion

The cost of professional home cleaning can be a significant investment, but the benefits it offers in terms of time savings, quality, and convenience often outweigh the expense. Evaluating your budget, cleaning needs, and lifestyle can help determine whether professional cleaning services are worth the investment for you. For many homeowners, the enhanced quality of life, reduced stress, and improved health provided by professional cleaning make it a valuable and worthwhile expenditure. Whether you choose to hire a professional cleaner or explore alternative options, maintaining a clean and organized home is essential for creating a comfortable and healthy living environment.

The Benefits of Installing a Video Doorbell

0

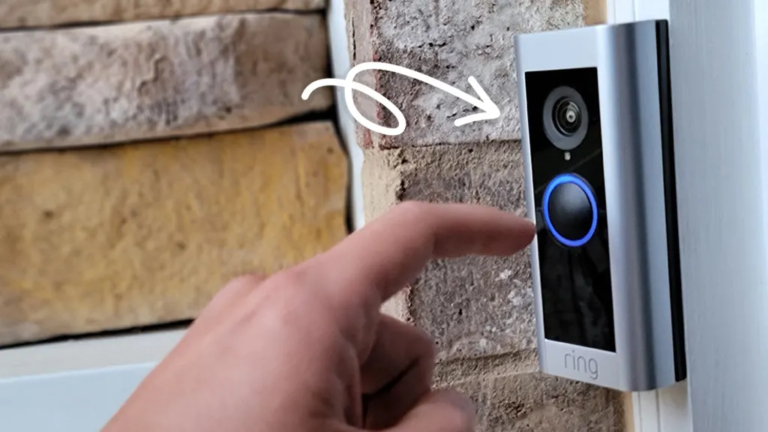
In an age where technology continually evolves, integrating smart devices into our homes has become increasingly popular. One such device that has garnered significant attention is the video doorbell. These innovative gadgets offer a blend of convenience, security, and advanced features that traditional doorbells simply cannot match. In this comprehensive guide, we will explore the many benefits of installing a video doorbell and why it could be a valuable addition to your home.

1. Enhanced Home Security

One of the primary benefits of installing a video doorbell is the significant boost it provides to your home’s security. Here’s how:

  • Real-Time Video Monitoring: Video doorbells allow you to see who is at your door in real time. With a built-in camera, you can view live video footage directly on your smartphone or tablet, giving you a clear view of visitors or potential intruders before you open the door.
  • Motion Detection Alerts: Most video doorbells come equipped with motion sensors that can detect movement near your front door. When motion is detected, you receive instant notifications on your mobile device, allowing you to monitor activity even when you’re not at home.
  • Two-Way Audio Communication: Video doorbells often feature two-way audio, enabling you to communicate with visitors or intruders without opening the door. This feature is particularly useful for verifying deliveries or deterring potential threats.
  • Recorded Footage: Many video doorbells offer cloud storage options for recording and storing video footage. This means you have a record of all interactions at your door, which can be invaluable for security purposes or in case of disputes.

2. Convenience and Accessibility

Beyond enhancing security, video doorbells offer a range of conveniences that make them a practical addition to any home:

  • Remote Access: With a video doorbell, you can answer your door from anywhere in the world. Whether you’re at work, on vacation, or running errands, you can view who’s at your door and communicate with them via your smartphone.
  • Integration with Smart Home Systems: Video doorbells often integrate seamlessly with other smart home devices. This means you can connect your doorbell to smart locks, lights, and alarms, creating a comprehensive home automation system that enhances both convenience and security.
  • Easy Installation: Installing a video doorbell is typically straightforward and doesn’t require extensive wiring or professional assistance. Many models are designed for DIY installation, making it accessible for homeowners without technical expertise.
  • Customizable Settings: Video doorbells come with various customization options, such as adjusting motion sensitivity, setting up specific zones for alerts, and creating custom ringtones. This flexibility allows you to tailor the device to your specific needs and preferences.

3. Improved Visitor Management

Managing visitors becomes more efficient and organized with a video doorbell:

  • Screening Visitors: You can screen visitors before opening the door, reducing the risk of unexpected or unwanted guests. This is particularly useful for avoiding door-to-door salespeople or verifying the identity of delivery personnel.
  • Package Delivery Verification: Video doorbells are a valuable tool for managing package deliveries. You can confirm when a package has been dropped off, and even communicate with the delivery person if you have specific instructions.
  • Enhanced Communication: Two-way audio allows for better communication with visitors. You can instruct delivery personnel where to leave packages, greet guests, or inform them of any changes in your plans without needing to open the door.
  • Visitor Logs: Many video doorbells keep a log of visitors, including timestamps and video recordings. This can be helpful for tracking who has been to your home and when, providing an added layer of organization and oversight.

4. Increased Property Value

Installing a video doorbell can also have a positive impact on the value of your property:

  • Modern Appeal: As smart home technology becomes more desirable, features like video doorbells can enhance the appeal of your property to potential buyers. A modern, high-tech doorbell can make your home stand out in a competitive real estate market.
  • Added Security Features: Homes equipped with advanced security features, including video doorbells, are often perceived as safer and more desirable. This added security can be an attractive selling point for prospective buyers.
  • Potential for Higher Resale Value: Investing in smart home technology can increase the resale value of your home. As more buyers seek out homes with modern amenities, having a video doorbell can contribute to a higher asking price.

5. Enhanced Peace of Mind

The peace of mind that comes with a video doorbell is invaluable:

  • 24/7 Surveillance: Knowing that you have a video doorbell keeping watch over your front door provides a sense of security, whether you’re at home or away. The ability to monitor and review footage ensures that you’re always aware of what’s happening at your entrance.
  • Deterrent for Criminal Activity: The visible presence of a video doorbell can deter potential burglars or vandals. Many criminals avoid properties with visible security measures, knowing that their actions are being recorded and monitored.
  • Reduced Anxiety: For those who may feel anxious about answering the door, a video doorbell provides reassurance. You can screen visitors and communicate with them without opening the door, reducing the stress associated with unexpected visitors.
  • Emergency Response: In the event of an emergency, having a video doorbell allows you to quickly assess the situation and provide information to emergency responders. The recorded footage can also be useful for investigating incidents or providing evidence.

6. Cost-Effective Security Solution

Video doorbells offer a cost-effective way to enhance your home’s security:

  • Affordable Options: There is a wide range of video doorbells available at various price points, making it accessible for different budgets. You can choose a model that fits your needs and financial constraints.
  • Reduced Need for Additional Security Measures: Installing a video doorbell can reduce the need for other security measures, such as additional cameras or alarm systems. The comprehensive features of a video doorbell often cover multiple aspects of home security.
  • Energy Efficiency: Many video doorbells are designed to be energy-efficient, with low power consumption and long battery life. This ensures that you get reliable performance without incurring high energy costs.
  • Long-Term Savings: Investing in a video doorbell can lead to long-term savings by preventing potential security breaches and reducing the need for expensive security upgrades or repairs.

7. Versatile Applications

Video doorbells offer versatility beyond traditional security functions:

  • Pet Monitoring: Video doorbells can also be used to monitor pets when you’re away from home. If your pets are prone to getting into mischief, you can keep an eye on them and ensure they’re safe and comfortable.
  • Package Theft Prevention: Package theft is a common issue, especially during peak shopping seasons. A video doorbell allows you to monitor package deliveries and catch thieves in the act, potentially recovering stolen items.
  • Guest Management: For those who frequently entertain guests, a video doorbell provides an efficient way to manage arrivals. You can greet guests, provide instructions, or coordinate with others in your household without leaving your current activity.
  • Home Automation Integration: Many video doorbells integrate with other smart home devices, such as smart locks, lights, and voice assistants. This integration allows for seamless automation and control of your home’s systems.

Conclusion

The benefits of installing a video doorbell extend far beyond traditional doorbells, offering enhanced security, convenience, and peace of mind. From real-time video monitoring and motion detection to improved visitor management and increased property value, a video doorbell is a valuable addition to any home. By providing a comprehensive security solution that is cost-effective and versatile, video doorbells ensure that you and your family can enjoy a safer and more connected living environment. Whether you’re upgrading your current security system or looking for a new way to enhance your home’s functionality, a video doorbell is a smart investment that delivers tangible benefits.

How to Properly Maintain Your Home’s Electrical System

0

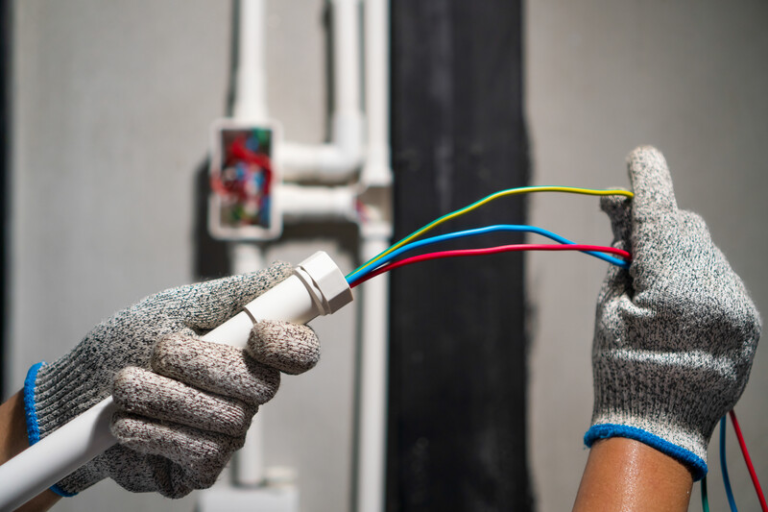
Maintaining your home’s electrical system is crucial for ensuring the safety, efficiency, and longevity of your household’s power supply. A well-maintained electrical system not only prevents potential hazards such as fires or electrocution but also enhances the performance of your appliances and reduces energy costs. This comprehensive guide will walk you through the key steps to properly maintain your home’s electrical system.

1. Understand Your Electrical System

Before diving into maintenance tasks, it’s essential to have a basic understanding of your home’s electrical system. Knowing how your system is structured and operates will help you identify issues and perform maintenance more effectively.

  • Circuit Breaker Panel: The circuit breaker panel, also known as the electrical panel or breaker box, is the heart of your electrical system. It controls the distribution of electricity throughout your home and houses the circuit breakers that protect your wiring from overloading.
  • Wiring: Electrical wiring runs throughout your home, connecting your outlets, switches, lights, and appliances to the power source. Depending on the age of your home, the wiring may be copper, aluminum, or a combination of both.
  • Outlets and Switches: These components are the access points for electricity in your home. They allow you to plug in and control your appliances and lighting.
  • Grounding System: Your home’s grounding system is designed to protect you from electrical shock. It provides a path for excess electricity to safely dissipate into the ground in the event of a fault.

2. Perform Regular Inspections

Regular inspections are key to maintaining your electrical system. By routinely checking your system, you can identify potential issues before they become serious problems.

  • Check the Circuit Breaker Panel: Inspect the circuit breaker panel for signs of wear, corrosion, or overheating. Ensure that all breakers are properly labeled, and test them periodically to make sure they trip correctly when overloaded.
  • Inspect Wiring: Look for any visible signs of wear, such as frayed or damaged wires. Pay special attention to areas where wires are exposed, such as in attics, basements, and crawl spaces. If you notice any issues, contact a licensed electrician for repairs.
  • Examine Outlets and Switches: Check outlets and switches for signs of damage, discoloration, or heat. Loose or faulty outlets can be a fire hazard, so tighten any loose screws and replace damaged components as needed.
  • Test Ground Fault Circuit Interrupters (GFCIs): GFCIs are designed to protect against electrical shock by shutting off power when they detect a ground fault. Test your GFCIs monthly by pressing the “test” button and ensuring the power shuts off. If it doesn’t, replace the GFCI immediately.

3. Keep Your Electrical Panel in Good Condition

The electrical panel is a critical component of your home’s electrical system, and keeping it in good condition is essential for safety and efficiency.

  • Avoid Overloading Circuits: Each circuit in your panel is designed to handle a specific amount of electricity. Avoid overloading circuits by not plugging too many devices into a single outlet or circuit. If your circuit breaker frequently trips, it may be a sign that the circuit is overloaded or that there’s a wiring issue.
  • Label Circuits Clearly: Properly labeling each circuit in your panel makes it easier to identify which circuit controls which part of your home. This is especially important in the event of an emergency or when performing maintenance.
  • Keep the Panel Accessible: Ensure that the electrical panel is easily accessible and free from obstructions. In case of an emergency, you should be able to quickly reach and operate the panel.
  • Schedule Professional Inspections: Have a licensed electrician inspect your electrical panel every few years to ensure it’s in good working condition. They can check for any signs of wear, outdated components, or other potential issues.

4. Maintain Your Home’s Wiring

Proper maintenance of your home’s wiring is essential for preventing electrical hazards and ensuring efficient power distribution.

  • Replace Old Wiring: If your home has outdated wiring, such as knob-and-tube or aluminum wiring, consider replacing it with modern copper wiring. Old wiring is more prone to overheating and can be a fire hazard.
  • Secure Loose Wires: Loose wires can cause short circuits or become damaged over time. Secure any loose wires using appropriate fasteners and avoid placing them under carpets or rugs where they could overheat or be damaged.
  • Avoid DIY Electrical Work: While it may be tempting to perform electrical work yourself, improper wiring can lead to serious hazards. Always hire a licensed electrician for any major electrical work, such as wiring installation or replacement.
  • Use Extension Cords Sparingly: Extension cords are not meant for permanent use. Overusing them can overload circuits and cause overheating. If you find yourself relying on extension cords regularly, consider adding more outlets to your home.

5. Ensure Proper Grounding

Proper grounding is essential for the safety of your home’s electrical system. It prevents electrical shock and protects your appliances from damage due to power surges.

  • Check Grounding Wires: Inspect your home’s grounding wires to ensure they are securely connected and in good condition. If you’re unsure whether your home is properly grounded, have a licensed electrician perform an inspection.
  • Use Surge Protectors: Surge protectors help protect your appliances and electronics from power surges caused by lightning strikes, power outages, or other electrical disturbances. Use surge protectors for all sensitive electronics, such as computers, televisions, and home theater systems.
  • Install a Whole-House Surge Protector: For added protection, consider installing a whole-house surge protector. This device is installed at the electrical panel and provides comprehensive protection against surges.

6. Practice Safe Electrical Habits

Maintaining your home’s electrical system isn’t just about inspections and repairs; it also involves practicing safe electrical habits in your daily life.

  • Unplug Unused Appliances: Unplugging appliances when they’re not in use can help prevent electrical fires and reduce energy consumption. This is especially important for high-wattage appliances like space heaters, irons, and toasters.
  • Avoid Overloading Outlets: Plugging too many devices into a single outlet can overload the circuit and cause overheating. Use power strips with built-in circuit breakers to prevent overloading, and avoid daisy-chaining multiple power strips together.
  • Keep Electrical Devices Away from Water: Water and electricity don’t mix. Keep electrical devices and outlets away from water sources, such as sinks, bathtubs, and pools. If an electrical device gets wet, unplug it immediately and do not use it until it has been inspected by a professional.
  • Educate Your Family: Ensure that everyone in your household understands basic electrical safety. Teach children to never insert objects into outlets, and explain the dangers of electricity.

7. Upgrade and Replace Outdated Components

As technology evolves, so do the components of your electrical system. Regularly upgrading and replacing outdated components can improve safety and efficiency.

  • Install AFCIs: Arc-fault circuit interrupters (AFCIs) protect against electrical arcs, which can cause fires. Consider upgrading your standard circuit breakers to AFCIs, especially in older homes.
  • Upgrade Outlets to GFCIs: If your home has older, non-GFCI outlets in areas where water is present (such as kitchens, bathrooms, and outdoor spaces), upgrade them to GFCIs for added safety.
  • Replace Old Light Fixtures: Old or damaged light fixtures can be a fire hazard. Replace outdated fixtures with modern, energy-efficient models, and ensure they are properly installed.
  • Switch to LED Lighting: LED bulbs are more energy-efficient and have a longer lifespan than traditional incandescent bulbs. Switching to LED lighting can reduce your energy bills and the frequency of bulb replacements.

8. Know When to Call a Professional

While regular maintenance can prevent many electrical issues, there are times when you need to call in a professional. Knowing when to seek professional help is crucial for maintaining a safe and reliable electrical system.

  • Frequent Circuit Breaker Trips: If your circuit breaker trips frequently, it could be a sign of a serious electrical issue, such as an overloaded circuit or faulty wiring. A licensed electrician can diagnose and fix the problem.
  • Flickering or Dimming Lights: Flickering or dimming lights can indicate a loose connection, faulty wiring, or an overloaded circuit. Don’t ignore these signs – have an electrician inspect your system.
  • Burning Smell or Warm Outlets: A burning smell or outlets that feel warm to the touch are signs of a potential electrical fire hazard. Turn off the power to the affected area and call an electrician immediately.
  • Outdated Electrical Panel: If your home still uses a fuse box or an outdated electrical panel, it’s time for an upgrade. Modern circuit breaker panels offer better protection and can handle the electrical demands of today’s appliances.

Conclusion

Proper maintenance of your home’s electrical system is essential for ensuring the safety, efficiency, and longevity of your home’s power supply. By performing regular inspections, maintaining your electrical panel and wiring, practicing safe electrical habits, and knowing when to call a professional, you can keep your electrical system in top condition. Taking these proactive steps will not only protect your home and family but also save you money on energy costs and potential repairs.

How to Choose the Perfect Paint Colors for Your Renovated Space

0

Selecting the perfect paint colors for your renovated space can be one of the most exciting yet challenging aspects of home improvement. The right color palette can completely transform a room, influencing its mood, aesthetic, and even perceived size. Whether you’re renovating a single room or an entire home, choosing the right colors requires thoughtful consideration. This guide will walk you through the process of selecting the perfect paint colors for your renovated space.

1. Understand the Space

Before you start selecting paint colors, it’s essential to understand the characteristics of the space you’re renovating. The size, shape, lighting, and purpose of a room can all influence how a color will look and feel.

  • Room Size and Shape: Dark colors tend to make a room feel smaller and cozier, while lighter colors can make a space feel larger and more open. If you’re working with a small room, consider using lighter shades to create the illusion of more space. Conversely, darker colors can add depth and drama to larger rooms.
  • Lighting: The amount and type of lighting in a room will affect how paint colors appear. Natural light brings out the truest colors, while artificial lighting can alter the shade. For rooms with limited natural light, choose warm, bright colors that can compensate for the lack of sunlight. If a room gets plenty of sunlight, cooler tones can help balance the warmth.
  • Room Function: Consider how the space will be used. For instance, a bedroom might benefit from calming, serene colors, while a kitchen might be better suited to bright, energizing hues. Think about the mood you want to create in each space and choose colors that support that atmosphere.

2. Explore Color Psychology

Color psychology is the study of how colors affect human emotions and behaviors. When choosing paint colors, it’s important to consider how different hues can influence the mood of a room.

  • Warm Colors: Reds, oranges, and yellows are considered warm colors. They tend to be stimulating and energizing, making them ideal for social spaces like living rooms, dining rooms, and kitchens.
  • Cool Colors: Blues, greens, and purples are cool colors that promote relaxation and calm. These shades work well in bedrooms, bathrooms, and home offices, where you want to create a peaceful environment.
  • Neutral Colors: Neutrals like whites, grays, and beiges are versatile and timeless. They provide a clean, uncluttered backdrop that works with any decor style. Neutral colors are perfect for creating a balanced, harmonious space.

3. Consider the Existing Elements

When choosing paint colors, it’s important to take into account the existing elements in the room, such as furniture, flooring, and fixtures. The paint should complement these elements rather than clash with them.

  • Furniture: The color of your furniture can guide your paint choices. If you have bold, colorful furniture, consider neutral walls to let the furniture stand out. If your furniture is more subdued, you can be bolder with your wall colors.
  • Flooring: The color and material of your flooring will also influence your paint choices. Dark wood floors, for example, pair well with light or neutral wall colors, while light flooring can handle darker, more dramatic wall shades.
  • Fixtures and Accessories: Don’t forget about the smaller details, like fixtures, artwork, and accessories. Your paint color should harmonize with these elements to create a cohesive look.

4. Create a Color Scheme

Once you’ve considered the room’s characteristics, color psychology, and existing elements, it’s time to create a color scheme. A well-planned color scheme will ensure that your space feels balanced and visually appealing.

  • Monochromatic Scheme: A monochromatic color scheme uses varying shades of a single color. This approach creates a harmonious, cohesive look that’s easy on the eyes. To add interest, incorporate different textures and finishes within the same color family.
  • Analogous Scheme: An analogous color scheme involves choosing colors that are next to each other on the color wheel, such as blue and green or yellow and orange. This creates a smooth transition between colors and is ideal for creating a serene, harmonious space.
  • Complementary Scheme: A complementary color scheme uses colors that are opposite each other on the color wheel, like blue and orange or red and green. This creates a vibrant, high-contrast look that can make a space feel dynamic and energetic.
  • Triadic Scheme: A triadic color scheme involves choosing three colors that are evenly spaced around the color wheel, such as red, blue, and yellow. This creates a balanced, vibrant look with plenty of visual interest.

5. Test Paint Samples

Even after selecting a color scheme, it’s crucial to test paint samples in your space before committing to a final color. Paint can look very different on a wall than it does on a paint chip, so this step is essential.

  • Sample Placement: Paint small swatches of your chosen colors directly on the walls of your room. Be sure to test them in different areas to see how they look in various lighting conditions.
  • Observe Over Time: Colors can change throughout the day as the lighting shifts. Take note of how the color appears in the morning, afternoon, and evening. This will give you a better idea of how the paint will look in your space at all times.
  • Compare Options: Don’t be afraid to test multiple colors. Comparing them side by side can help you see which one works best with your space and decor.

6. Think About Flow Between Rooms

If you’re renovating multiple rooms, it’s important to consider how the colors in each space will flow together. This is especially important in open-concept homes, where rooms are visible from one another.

  • Cohesive Palette: Choose colors that complement each other and create a cohesive flow throughout your home. You can use a unifying color or stick to a specific color scheme to ensure a seamless transition between spaces.
  • Accent Walls: If you want to introduce a bold color but are concerned about flow, consider using it as an accent wall. This allows you to add a pop of color without overwhelming the space or disrupting the flow.
  • Connecting Spaces: Hallways, foyers, and other transitional spaces should also be considered. Using neutral or coordinating colors in these areas can help connect different rooms and create a sense of continuity.

7. Consider the Finish

The finish of your paint can have a significant impact on the overall look of your room. Different finishes can change the way a color appears and how it interacts with light.

  • Matte Finish: A matte finish has no sheen and is perfect for hiding imperfections on walls. It’s ideal for low-traffic areas like bedrooms and living rooms.
  • Eggshell Finish: Eggshell has a slight sheen and is more durable than matte. It’s a popular choice for dining rooms, hallways, and other areas that see moderate traffic.
  • Satin Finish: Satin finishes are smooth and slightly glossy, making them easy to clean. They’re great for kitchens, bathrooms, and other high-traffic areas.
  • Semi-Gloss and Gloss Finishes: These finishes are shiny and reflective, making them perfect for trim, doors, and cabinets. They’re also the most durable and easiest to clean, making them ideal for high-use areas.

8. Trust Your Instincts

While it’s important to consider all the factors mentioned above, ultimately, the paint color you choose should be one that you love. Trust your instincts and choose colors that make you feel happy and comfortable in your space.

  • Personal Preference: Your home is a reflection of your personality, so don’t be afraid to choose colors that resonate with you, even if they’re not the most popular or trendy choices.
  • Experimentation: If you’re unsure, consider experimenting with color in smaller spaces like a powder room or an accent wall. This allows you to try out bold choices without committing to an entire room.
  • Consistency: While it’s important to be true to your preferences, maintaining some consistency in your color choices will help create a harmonious environment.

Conclusion

Choosing the perfect paint colors for your renovated space is a process that requires careful consideration of the room’s characteristics, color psychology, existing elements, and personal preferences. By following the steps outlined in this guide, you can confidently select colors that will enhance the beauty and functionality of your home. Whether you’re drawn to bold, vibrant hues or prefer a more subdued palette, the right paint colors can transform your space into a place that reflects your style and meets your needs.